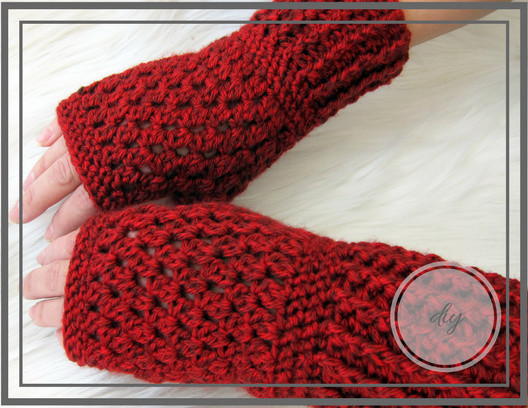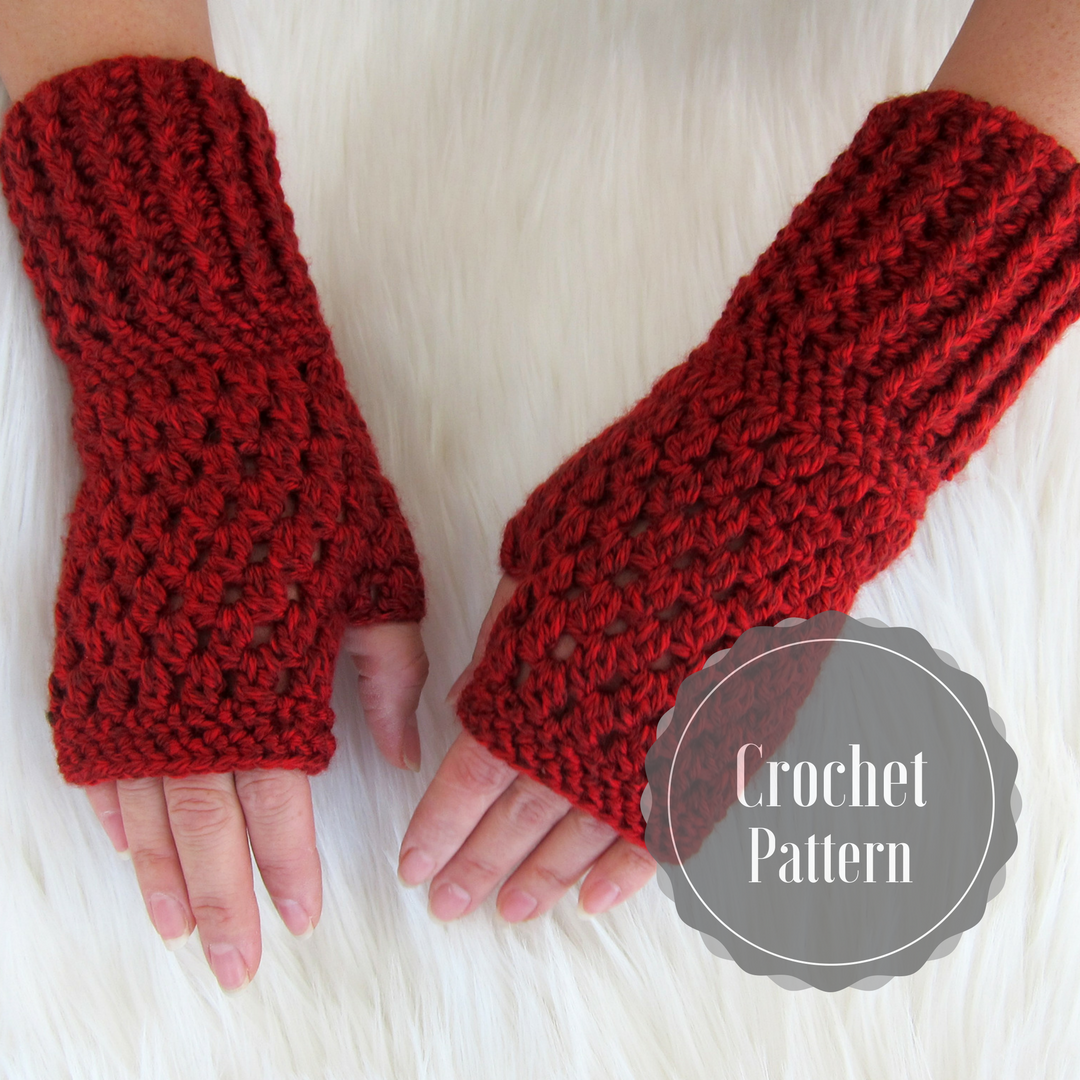
Super soft and full of texture, The Riley Fingerless Gloves have quickly become an everyday wear favorite!
THIS POST MAY CONTAIN AFFILIATE LINKS,
VIEW MY DISCLOSURE POLICY HERE FOR DETAILS.
PIN IT NOW, MAKE IT LATER
You can purchase an AD Free version on Etsy, here.
Materials
- U.S. G/6 (4.25mm) Crochet Hook
- Medium weight: I used Premier Everyday in Red Heather
- 65g
- 108m
- 117yds
- Tapestry needle for sewing in ends
- Stitch marker
Sizes
One-Size Adult Women = 8”/20.32 cm in length
Gauge
U.S. G/6 4HDC stitches = 1 inch, 3 HDC rows = 1 row
Stitches Used
For stitch definitions, please go here.
- SC – Single Crochet
- DC – Double Crochet
- FPDC – FrontPost Double Crochet
- BPDC – BackPost Double Crochet
- HHDC – Herringbone Half Double Crochet
- DC Cluster
Pattern Notes
The gloves in the picture use a starting chain of 32. This is the standard “one size fits all”. Since some people have smaller or larger hands, this pattern is easily adjusted using multiple of 2 (add 2 for starting chain)
Keep in mind the yarn will stretch, so The Riley Fingerless Gloves feel snug at first.
Begin Pattern
Chain 32 (leave a long 6”-8” beginning tail)
Row 1: Work a DC4th chain from hook (counts as 1st DC) , DC in each stitch across. slip stitch in the top of the first DC (be careful not to twist). We will sew the opening up later with the long tail.
(30)
Row 2-9: CH3 (counts as first DC), FPDC, BPDC, repeat from *, slip stitch in the top stitch of the CH3. (30)
Row 10-11: CH 2 (counts as 1 HDC). HHDC in each stitch. Slip stitch in the top of the first stitch. 30 stitches
Row 12: CH 3 (counts as first DC),. *DC Cluster in CH 1 space, CH 1, Skip cluster*, repeat from *. End with a CH 1. Slip stitch in the top of the first stitch. = 30 stitches
Row 13: CH 4 (counts as first DC and Ch1), *DC Cluster in CH1 gap of previous row, CH 1, Skip next stitch, repeat from * End with a DC Cluster. Slip stitch in the second chain of the first stitch. = 30
Row 14: CH 3 (counts as first DC),. *DC Cluster in CH 1 space, CH 1, Skip cluster*, repeat from *. End with a CH 1. Slip stitch in the top of the first stitch. = 30
Row 15: CH 4 (counts as first DC and Ch1), *DC Cluster in CH1 gap of previous row, CH 1, Skip next stitch, repeat from * End with a DC Cluster. Slip stitch in the second chain of the first stitch. = 30
Row 16: CH 4. In first CH 1 space [DC Cluster, CH 1, DC Cluster, CH 1], *CH 1, Skip next stitch, DC Cluster, repeat from * End with a DC Cluster. Slip stitch in the second chain of the first stitch. = 14 DC Clusters + 15 CH 1 stitches
Row 17: CH 4. *DC Cluster in CH1 gap of previous row, CH 1, Skip next stitch, repeat from * End with a DC Cluster. Slip stitch in the second chain of the first stitch. 30
Next create the thumbhole
CH 3, Flatten/Fold the glove, count 5 DC clusters to the left of the CH 3. Place a stitch marker between the 5th and 6th DC cluster looping all the way through to the back side of the glove. This will create a new “section” with 4 DC clusters marked off with the stitch marker. This new section is our thumbhole. If you need a larger thumbhole, count 4 DC clusters from the CH3, place the stitch marker in the same as describe above.
From here on we will not work in the stitches that are sectioned off by the stitch marker.
Row 18: *DC Cluster in CH1 space of previous row, CH 1, Skip next stitch* repeat until you have 4 DC clusters and 5 CH1, make a slip stitch between the stitches where the stitch marker is placed. This will finalize the thumbhole section.
CH1, *DC Cluster in CH1 space of previous row (not in the same stitch as the slip stitch), CH 1, Skip next stitch* repeat until end with a DC Cluster. Slip stitch in the top of the CH 3.
Row 19: CH 4. *DC Cluster in CH1 space of previous row, CH 1, Skip next stitch, * repeat from End with a DC Cluster. Slip stitch in the second chain of the first stitch.
Row 20: CH 2. HHDC in each stitch. Slip stitch in the top of the first stitch.
Row 21: CH 2. HHDC in each stitch. Slip stitch in the top of the first stitch. Finish off.
Weave in ends. Don’t forget to sew up the split in the cuff.
SHARE, LIKE, SUBSCRIBE!
If you make the fingerless gloves from this pattern, please feel free to tag me on Instagram or Facebook. I would love to see it! Also if you find a mistake here or have a question about it, don’t hesitate to contact me.
If you liked this pattern, be sure to share it with your friends and followers, I truly appreciate it. For more free patterns and stitch tutorials – follow my Instagram or Facebook and allow notifications to get a pop-up whenever new post is published.